Layton Miracle Mask Guide
← All games

Monte d'Or · the Professor's trunk

Miracle Mask Minigames: Toy Robot, Shop, Rabbit, Horse and Ruins

Every Miracle Mask minigame in one display case: the Toy Robot, the One-Stop Shop, the Rabbit Show, Horse Riding and the Akbadain Ruins. Pick a stage, read a hint, then reveal the solution and tick it off.

  • 5 activities
  • 0 cleared

All minigames

Pick a display case above to open its guide.

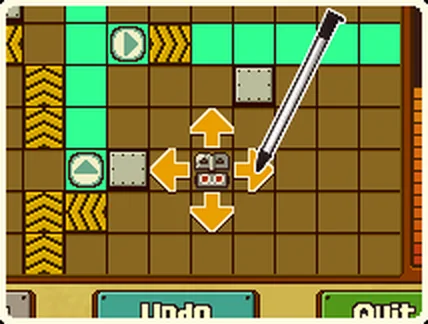
The Toy Robot help screen: the robot on a maze of conveyor belts and blocks, with yellow arrows around it

Minigame

The Toy Robot

Steer a windup toy robot across little dioramas, from a dusty lab to a floating castle, landing it exactly on the goal while toy mice scurry about.

Unlocks
After Puzzle 005, Robot Factory (Chapter 1)
Stages
10 main stages + 15 in the Hidden Maze
Controls
Touch the arrows on the Touch Screen
Reward
All ten main stages: The Toymaker's House in Layton's Challenges, and Hidden Maze on the Toy Robot map, with 15 more stages
How it plays
  • Tap the yellow arrows to send the robot up, down, left or right. It always moves three squares and can't stop or turn midway.
  • Walls and blocks stop it early. It has to land exactly on the red goal panel; rolling over it doesn't count.
  • Conveyor belts carry the robot along once it lands on them.
  • Mice move only when the robot moves. Bump into one and the stage is over.
  • A golden windup key powers the robot up for that move: it keeps going and smashes cracked blocks until a solid wall stops it.
  • You get up to 30 moves per stage.

0 of 25 stages cleared

Main stages

Hidden Maze

  • Robot
  • Goal
  • Mouse
  • Windup key
  • Cracked block
  • Solid block
  • Conveyor

Stage 1

Abandoned Lab

Unlock: Solve Puzzle 005, Robot Factory · 7 moves

"A forgotten lab full of weird devices but mostly filled with dust."

Hint

Start with ↑ ↑. The whole route takes 7 moves (the limit is 30).

Show the solution

1↑ 2↑ 3↓ 4→ 5← 6↑ 7←

1234567
Start

The teal line is the robot's route; the numbers mark where it stops after each move. The mice move at the same time as the robot, so follow the order exactly.

Stage 2

Unearthed Ruin

Unlock: Solve Puzzle 015, Fix the Fossil · 8 moves

UK name: Rediscovered Ruin

"An ancient ruin left by a lost culture. Small but perfectly formidable."

Hint

Start with → ↓. The whole route takes 8 moves (the limit is 30).

Show the solution

1→ 2↓ 3↑ 4→ 5← 6↑ 7→ 8↓

12345678
Start

The teal line is the robot's route; the numbers mark where it stops after each move. The mice move at the same time as the robot, so follow the order exactly.

Stage 3

Colossal Coliseum

Unlock: Solve Puzzle 029, Tenth-Round Ace · 9 moves

"A grand stadium built to pit man against man in a test of strength!"

Hint

Start with → →. The whole route takes 9 moves (the limit is 30).

Show the solution

1→ 2→ 3↓ 4← 5↑ 6→ 7↑ 8→ 9↓

123456789
Start

The teal line is the robot's route; the numbers mark where it stops after each move. The mice move at the same time as the robot, so follow the order exactly.

Stage 4

Inviting Oasis

Unlock: Solve Puzzle 058, Sorting Blocks · 5 moves

"A cool spring that grants relief to those trekking over the arid sands."

Hint

Start with → ↓. The whole route takes 5 moves (the limit is 30).

Show the solution

1→ 2↓ 3↑ 4← 5←

12345
Start

The teal line is the robot's route; the numbers mark where it stops after each move. The mice move at the same time as the robot, so follow the order exactly.

Stage 5

Perilous Pyramid

Unlock: Solve Puzzle 067, Language of Love · 12 moves

"An eerie place said to curse all who enter. But it can't be true...can it?"

Hint

Start with → ↑. The whole route takes 12 moves (the limit is 30).

Show the solution

1→ 2↑ 3← 4↓ 5→ 6↑ 7↑ 8→ 9↓ 10↑ 11← 12↓

123456789101112
Start

The teal line is the robot's route; the numbers mark where it stops after each move. The mice move at the same time as the robot, so follow the order exactly.

Stage 6

Weird Wilds

Unlock: Solve Puzzle 075, Grand Horse Race · 8 moves

"A remote jungle filled with plants that don't even have names yet."

Hint

Start with ↑ ←. The whole route takes 8 moves (the limit is 30).

Show the solution

1↑ 2← 3↓ 4→ 5← 6↓ 7← 8↑

12345678
Start

The teal line is the robot's route; the numbers mark where it stops after each move. The mice move at the same time as the robot, so follow the order exactly.

Stage 7

Sturdy Ship

Unlock: Solve Puzzle 082, Rainbow Repair · 8 moves

"Ruthless pirates once sailed the seven seas aboard this ship."

Hint

Start with ↑ ←. The whole route takes 8 moves (the limit is 30).

Show the solution

1↑ 2← 3↑ 4↓ 5← 6→ 7↓ 8→

12345678
Start

The teal line is the robot's route; the numbers mark where it stops after each move. The mice move at the same time as the robot, so follow the order exactly.

Stage 8

Small Town

Unlock: Solve Puzzle 108, Balls and Boxes · 12 moves

UK name: Teensy Town

"The houses may be miniature, but you can still expect a big challenge!"

Hint

Start with ↓ ↑. The whole route takes 12 moves (the limit is 30).

Show the solution

1↓ 2↑ 3↑ 4→ 5← 6← 7↓ 8← 9↓ 10→ 11← 12↓

123456789101112
Start

The teal line is the robot's route; the numbers mark where it stops after each move. The mice move at the same time as the robot, so follow the order exactly.

Stage 9

Floating Castle

Unlock: Solve Puzzle 130, Water, Wood, Fire · 18 moves

"If you look up at the sky after a storm clears, you just might catch a glimpse."

Hint

Start with ← ↑. The whole route takes 18 moves (the limit is 30).

Show the solution

1← 2↑ 3↑ 4→ 5↓ 6← 7↑ 8↓ 9← 10↓ 11↓ 12↑ 13→ 14↓ 15← 16↓ 17→ 18←

123456789101112131415161718
Start

The teal line is the robot's route; the numbers mark where it stops after each move. The mice move at the same time as the robot, so follow the order exactly.

Stage 10

Eastern Palace

Unlock: Clear the other nine stages · 13 moves

"Use the power of the golden keys to defeat the enemy!"

Hint

Start with ← ↑. The whole route takes 13 moves (the limit is 30).

Show the solution

1← 2↑ 3→ 4→ 5↓ 6← 7↑ 8↑ 9← 10← 11→ 12↓ 13↓

This route hasn't been verified step by step. Grab the golden windup keys to smash through the boss.

Hidden Maze 1

A Grand Entrance

Unlock: clear all ten main stages to open the Hidden Maze · 8 moves

"The maze begins! It looks complex, but is all this stuff actually helpful?"

Hint

Start with ↑ ↑. The whole route takes 8 moves (the limit is 30).

Show the solution

1↑ 2↑ 3↓ 4↓ 5→ 6↑ 7↑ 8↓

12345678
Start

The teal line is the robot's route; the numbers mark where it stops after each move. The mice move at the same time as the robot, so follow the order exactly.

Hidden Maze 2

An Ambush or Seven

Unlock: clear all ten main stages to open the Hidden Maze · 12 moves

"This is quite the popular spot! It's pretty tight all right! Be careful!"

Hint

Start with ↓ ←. The whole route takes 12 moves (the limit is 30).

Show the solution

1↓ 2← 3↑ 4← 5↓ 6↑ 7→ 8→ 9↓ 10→ 11→ 12←

123456789101112
Start

The teal line is the robot's route; the numbers mark where it stops after each move. The mice move at the same time as the robot, so follow the order exactly.

Hidden Maze 3

Barrage of Belts

Unlock: clear all ten main stages to open the Hidden Maze · 6 moves

"You might be going around in circles, but at least there are no enemies!"

Hint

Start with ← ↓. The whole route takes 6 moves (the limit is 30).

Show the solution

1← 2↓ 3← 4← 5↓ 6↓

123456
Start

The teal line is the robot's route; the numbers mark where it stops after each move. The mice move at the same time as the robot, so follow the order exactly.

Hidden Maze 4

Circles of Trust

Unlock: clear all ten main stages to open the Hidden Maze · 14 moves

"You can get past those mice if you blend in. Follow their route, maybe?"

Hint

Start with ↑ →. The whole route takes 14 moves (the limit is 30).

Show the solution

1↑ 2→ 3↑ 4↑ 5← 6↓ 7↓ 8← 9↑ 10→ 11→ 12↑ 13← 14↓

1234567891011121314
Start

The teal line is the robot's route; the numbers mark where it stops after each move. The mice move at the same time as the robot, so follow the order exactly.

Hidden Maze 5

Tempting Trinkets

Unlock: clear all ten main stages to open the Hidden Maze · 18 moves

"Those golden keys may be inviting, but you can't just grab them willy-nilly!"

Hint

Start with ↓ →. The whole route takes 18 moves (the limit is 30).

Show the solution

1↓ 2→ 3↓ 4→ 5← 6← 7↑ 8← 9↑ 10→ 11↓ 12→ 13↓ 14→ 15↓ 16↓ 17↑ 18→

123456789101112131415161718
Start

The teal line is the robot's route; the numbers mark where it stops after each move. The mice move at the same time as the robot, so follow the order exactly.

Hidden Maze 6

So Near, Yet So Far

Unlock: clear all ten main stages to open the Hidden Maze · 15 moves

"Sometimes the shortest possible route still feels like the long way around."

Hint

Start with → ↓. The whole route takes 15 moves (the limit is 30).

Show the solution

1→ 2↓ 3← 4→ 5↑ 6← 7↓ 8← 9↓ 10↓ 11↑ 12→ 13→ 14→ 15↓

123456789101112131415
Start

The teal line is the robot's route; the numbers mark where it stops after each move. The mice move at the same time as the robot, so follow the order exactly.

Hidden Maze 7

Close Calls

Unlock: clear all ten main stages to open the Hidden Maze · 19 moves

"If you watch the enemies carefully, you can avoid them by a hair's breadth."

Hint

Start with → →. The whole route takes 19 moves (the limit is 30).

Show the solution

1→ 2→ 3← 4← 5← 6↓ 7↑ 8→ 9→ 10↑ 11→ 12→ 13↑ 14← 15← 16← 17↑ 18→ 19→

12345678910111213141516171819
Start

The teal line is the robot's route; the numbers mark where it stops after each move. The mice move at the same time as the robot, so follow the order exactly.

Hidden Maze 8

Mousey Mambo

Unlock: clear all ten main stages to open the Hidden Maze · 19 moves

"Try not to disturb the mice and their endless, elegant dance!"

Hint

Start with → →. The whole route takes 19 moves (the limit is 30).

Show the solution

1→ 2→ 3← 4↓ 5→ 6↓ 7↑ 8→ 9→ 10→ 11↓ 12← 13↓ 14← 15← 16↓ 17→ 18← 19↑

12345678910111213141516171819
Start

The teal line is the robot's route; the numbers mark where it stops after each move. The mice move at the same time as the robot, so follow the order exactly.

Hidden Maze 9

Alleyway Escape

Unlock: clear all ten main stages to open the Hidden Maze · 23 moves

"Mice chasing you down a tight alley? Relax! You'll be fine...probably!"

Hint

Start with → →. The whole route takes 23 moves (the limit is 30).

Show the solution

1→ 2→ 3→ 4↑ 5↑ 6↓ 7↑ 8→ 9← 10← 11↓ 12← 13↑ 14← 15↑ 16→ 17→ 18↓ 19→ 20↑ 21→ 22↑ 23←

1234567891011121314151617181920212223
Start

The teal line is the robot's route; the numbers mark where it stops after each move. The mice move at the same time as the robot, so follow the order exactly.

Hidden Maze 10

Sneaking Skills

Unlock: clear all ten main stages to open the Hidden Maze · 15 moves

"Going near the enemy on purpose is risky, but when you must..."

Hint

Start with ← ↓. The whole route takes 15 moves (the limit is 30).

Show the solution

1← 2↓ 3← 4↑ 5← 6↓ 7← 8→ 9↑ 10→ 11↑ 12→ 13↓ 14← 15↓

123456789101112131415
Start

The teal line is the robot's route; the numbers mark where it stops after each move. The mice move at the same time as the robot, so follow the order exactly.

Hidden Maze 11

Crossing Paths

Unlock: clear all ten main stages to open the Hidden Maze · 16 moves

"Always have your next move in mind-- or you'll be tripping over mice!"

Hint

Start with ↓ →. The whole route takes 16 moves (the limit is 30).

Show the solution

1↓ 2→ 3↓ 4↑ 5→ 6↓ 7← 8→ 9↑ 10↑ 11← 12↓ 13→ 14← 15← 16↓

12345678910111213141516
Start

The teal line is the robot's route; the numbers mark where it stops after each move. The mice move at the same time as the robot, so follow the order exactly.

Hidden Maze 12

Crazy Conveyors

Unlock: clear all ten main stages to open the Hidden Maze · 8 moves

"Conveyor belts as far as the eye can see. Just don't get carried away!"

Hint

Start with ← ↑. The whole route takes 8 moves (the limit is 30).

Show the solution

1← 2↑ 3← 4← 5↓ 6← 7↑ 8→

12345678
Start

The teal line is the robot's route; the numbers mark where it stops after each move. The mice move at the same time as the robot, so follow the order exactly.

Hidden Maze 13

Pick a Goal

Unlock: clear all ten main stages to open the Hidden Maze · 18 moves

"It doesn't matter which goal you aim for, as long as you can get to it!"

Hint

Start with ↓ →. The whole route takes 18 moves (the limit is 30).

Show the solution

1↓ 2→ 3→ 4↓ 5↓ 6→ 7↑ 8← 9↑ 10↑ 11↓ 12→ 13→ 14↓ 15→ 16↓ 17↑ 18←

123456789101112131415161718
Start

The teal line is the robot's route; the numbers mark where it stops after each move. The mice move at the same time as the robot, so follow the order exactly.

Hidden Maze 14

Decision of Destiny

Unlock: clear all ten main stages to open the Hidden Maze · 10 moves

"The very first step you take here will decide your fate. Choose carefully."

Hint

Start with ← →. The whole route takes 10 moves (the limit is 30).

Show the solution

1← 2→ 3↑ 4→ 5↓ 6→ 7→ 8← 9← 10↓

12345678910
Start

The teal line is the robot's route; the numbers mark where it stops after each move. The mice move at the same time as the robot, so follow the order exactly.

Hidden Maze 15

Journey's End

Unlock: clear all ten main stages to open the Hidden Maze · 26 moves

"The deepest floor of the maze. No one who's entered has ever returned."

Hint

Start with ↓ →. The whole route takes 26 moves (the limit is 30).

Show the solution

1↓ 2→ 3→ 4→ 5↑ 6← 7↓ 8↓ 9← 10↓ 11↑ 12← 13↓ 14← 15↑ 16→ 17↓ 18↑ 19← 20↑ 21← 22↓ 23← 24→ 25← 26←

1234567891011121314151617181920212223242526
Start

The teal line is the robot's route; the numbers mark where it stops after each move. The mice move at the same time as the robot, so follow the order exactly.

↑ Back to the showcase

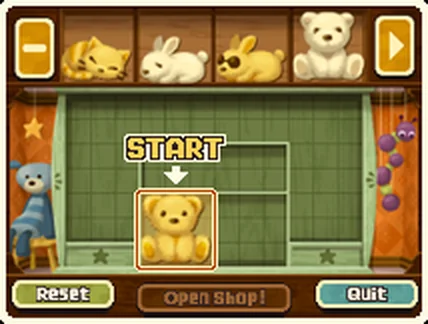
The One-Stop Shop help screen: a teddy bear marked START on a green shelf, with more plush toys in the tray

Minigame

The One-Stop Shop

Stock the shelves so a single customer buys every item in one trip, hopping from item to item by matching colour or type.

Unlocks
After Puzzle 010, The Place to Be! (Chapter 1)
Stages
10 aisles
Controls
Drag goods with the stylus
Reward
All ten aisles: The Shopkeeper's House in Layton's Challenges
How it plays
  • Drag goods from the tray onto the shelf, then tap Open Shop!
  • The customer buys the starting item first, then moves to a touching item that shares its colour or its type, and so on.
  • If two matching items touch the one just bought, the customer can't choose and stops shopping. Each step needs exactly one match.
  • Goods can't cross the shelf dividers. Sell everything to clear the aisle.

0 of 10 aisles cleared

Aisles

Aisle 1

Fresh Fruits

Unlock: Solve Puzzle 010, The Place to Be! · 6 items

1
Illustration: the starting item (1) is already on the shelf. Thick lines are shelf dividers.

Goods to place

  • Misthallery Deliciousred apple
  • Granny Jonesgreen apple
  • Stately Pineapplegreen pineapple
  • Paradise Pineappleyellow pineapple
  • King Cavendishyellow banana
  • Queen Plantaingreen banana
Hint

The customer starts with Misthallery Delicious (red apple). Next they should buy Granny Jones, which shares its type. One working order ends with Queen Plantain.

Show the solution
123456
Illustration: numbers show the order the customer buys in.

Buying order

  1. Misthallery Delicious (red apple)
  2. Granny Jones (green apple, same type)
  3. Stately Pineapple (green pineapple, same colour)
  4. Paradise Pineapple (yellow pineapple, same type)
  5. King Cavendish (yellow banana, same colour)
  6. Queen Plantain (green banana, same type)

Aisle 2

Crockery

Unlock: Solve Puzzle 019, Spinning Maize · 6 items

1
Illustration: the starting item (1) is already on the shelf. Thick lines are shelf dividers.

Goods to place

  • Moon Mugyellow mug
  • Starry Mugred mug
  • Duckling Potyellow teapot
  • Ornate Potred teapot
  • Slippery Sauceryellow saucer
  • Hot Saucerred saucer
Hint

The customer starts with Moon Mug (yellow mug). Next they should buy Starry Mug, which shares its type. One working order ends with Ornate Pot.

Show the solution
123456
Illustration: numbers show the order the customer buys in. Other layouts work too.

Buying order

  1. Moon Mug (yellow mug)
  2. Starry Mug (red mug, same type)
  3. Hot Saucer (red saucer, same colour)
  4. Slippery Saucer (yellow saucer, same type)
  5. Duckling Pot (yellow teapot, same colour)
  6. Ornate Pot (red teapot, same type)

Aisle 3

Explorer's Needs

Unlock: Solve Puzzle 030, Big Cake, Little Cake · 6 items

UK name: Orienteering

1
Illustration: the starting item (1) is already on the shelf. Thick lines are shelf dividers.

Goods to place

  • Inverted Compassblue compass
  • Whirly Compassred compass
  • Glowing Lanternblue lantern
  • Blazing Lanternred lantern
  • Ocean Camerablue camera
  • Shutterbug Cameragreen camera
Hint

The customer starts with Inverted Compass (blue compass). Next they should buy Whirly Compass, which shares its type. One working order ends with Shutterbug Camera.

Show the solution
123456
Illustration: numbers show the order the customer buys in.

Buying order

  1. Inverted Compass (blue compass)
  2. Whirly Compass (red compass, same type)
  3. Blazing Lantern (red lantern, same colour)
  4. Glowing Lantern (blue lantern, same type)
  5. Ocean Camera (blue camera, same colour)
  6. Shutterbug Camera (green camera, same type)

Aisle 4

Instruments

Unlock: Solve Puzzle 042, Couple at the Café · 7 items

1
Illustration: the starting item (1) is already on the shelf. Thick lines are shelf dividers.

Goods to place

  • Witch's Songpurple ocarina
  • Fairy's Breathyellow ocarina
  • Goblin's Bellowred ocarina
  • Fine Fiddlepurple violin
  • Canary Fiddleyellow violin
  • Sunset Violinred violin
  • Booming Snarered drum
Hint

The customer starts with Witch's Song (purple ocarina). Next they should buy Fairy's Breath, which shares its type. One working order ends with Booming Snare.

Show the solution
1234567
Illustration: numbers show the order the customer buys in. Other layouts work too.

Buying order

  1. Witch's Song (purple ocarina)
  2. Fairy's Breath (yellow ocarina, same type)
  3. Canary Fiddle (yellow violin, same colour)
  4. Fine Fiddle (purple violin, same type)
  5. Sunset Violin (red violin, same type)
  6. Goblin's Bellow (red ocarina, same colour)
  7. Booming Snare (red drum, same colour)

Aisle 5

Baked Goods

Unlock: Solve Puzzle 047, Trial by Tennis · 8 items

1
Illustration: the starting item (1) is already on the shelf. Thick lines are shelf dividers.

Goods to place

  • Cinqberry Ringred doughnut
  • Lime Glazegreen doughnut
  • Fiery Baguettered bread
  • Tasty Rollyellow bread
  • Farmhouse Rollwhite bread
  • Pistachio Baguettegreen bread
  • Citrus Cakeyellow cake
  • Snowball Cakewhite cake
Hint

The customer starts with Cinqberry Ring (red doughnut). Next they should buy Fiery Baguette, which shares its colour. One working order ends with Lime Glaze.

Show the solution
12345678
Illustration: numbers show the order the customer buys in. Other layouts work too.

Buying order

  1. Cinqberry Ring (red doughnut)
  2. Fiery Baguette (red bread, same colour)
  3. Tasty Roll (yellow bread, same type)
  4. Citrus Cake (yellow cake, same colour)
  5. Snowball Cake (white cake, same type)
  6. Farmhouse Roll (white bread, same colour)
  7. Pistachio Baguette (green bread, same type)
  8. Lime Glaze (green doughnut, same colour)

Aisle 6

Green Thumb

Unlock: Solve Puzzle 057, Stitching Squares · 8 items

UK name: Flora

1
Illustration: the starting item (1) is already on the shelf. Thick lines are shelf dividers.

Goods to place

  • Whistling Dracaenagreen leafy plant
  • Flaming Philodendronred leafy plant
  • Starry Schefflerayellow leafy plant
  • Jade Cactusgreen cactus
  • Floral Cactuspurple cactus
  • Wild Cactusyellow cactus
  • Heartfelt Bouquetred bouquet
  • Celebration Bouquetpurple bouquet
Hint

The customer starts with Whistling Dracaena (green leafy plant). Next they should buy Jade Cactus, which shares its colour. One working order ends with Wild Cactus.

Show the solution
12345678
Illustration: numbers show the order the customer buys in. Other layouts work too.

Buying order

  1. Whistling Dracaena (green leafy plant)
  2. Jade Cactus (green cactus, same colour)
  3. Floral Cactus (purple cactus, same type)
  4. Celebration Bouquet (purple bouquet, same colour)
  5. Heartfelt Bouquet (red bouquet, same type)
  6. Flaming Philodendron (red leafy plant, same colour)
  7. Starry Schefflera (yellow leafy plant, same type)
  8. Wild Cactus (yellow cactus, same colour)

Aisle 7

Apparel

Unlock: Solve Puzzle 072, A Cup of Tiles · 9 items

1
Illustration: the starting item (1) is already on the shelf. Thick lines are shelf dividers.

Goods to place

  • Trendy Capblue hat
  • Top Hatblack hat
  • Lady Bowlergreen hat
  • Retro Tieblue tie
  • Sleek Tieblack tie
  • Patterned Tiegreen tie
  • Smart Bootsblue shoes
  • Classic Dress shoesblack shoes
  • Hip Bootsgreen shoes
Hint

The customer starts with Trendy Cap (blue hat). Next they should buy Retro Tie, which shares its colour. One working order ends with Hip Boots.

Show the solution
123456789
Illustration: numbers show the order the customer buys in. Other layouts work too.

Buying order

  1. Trendy Cap (blue hat)
  2. Retro Tie (blue tie, same colour)
  3. Smart Boots (blue shoes, same colour)
  4. Classic Dress shoes (black shoes, same type)
  5. Sleek Tie (black tie, same colour)
  6. Top Hat (black hat, same colour)
  7. Lady Bowler (green hat, same type)
  8. Patterned Tie (green tie, same colour)
  9. Hip Boots (green shoes, same colour)

Aisle 8

Plush Toys

Unlock: Solve Puzzle 083, Settle the Scores · 9 items

UK name: Soft Toys

1
Illustration: the starting item (1) is already on the shelf. Thick lines are shelf dividers.

Goods to place

  • Podgikinsred bunny
  • Mr. B.yellow bunny
  • Nibbleswhite bunny
  • Grufferred teddy bear
  • Fluffyyellow teddy bear
  • Snowflakewhite teddy bear
  • Skitty Catred cat
  • Sleepy Whiskersyellow cat
  • Nuzzleswhite cat
Hint

The customer starts with Podgikins (red bunny). Next they should buy Mr. B., which shares its type. One working order ends with Skitty Cat.

Show the solution
123456789
Illustration: numbers show the order the customer buys in. Other layouts work too.

Buying order

  1. Podgikins (red bunny)
  2. Mr. B. (yellow bunny, same type)
  3. Nibbles (white bunny, same type)
  4. Snowflake (white teddy bear, same colour)
  5. Gruffer (red teddy bear, same type)
  6. Fluffy (yellow teddy bear, same type)
  7. Sleepy Whiskers (yellow cat, same colour)
  8. Nuzzles (white cat, same type)
  9. Skitty Cat (red cat, same type)

Aisle 9

Hobby

Unlock: Solve Puzzle 114, Emperor's Throne 2 · 10 items

1
Illustration: the starting item (1) is already on the shelf. Thick lines are shelf dividers.

Goods to place

  • Safari 4x4yellow car
  • Safety 4x4blue car
  • Cherry Classicred car
  • Clean Classicwhite car
  • Shiny Hornetyellow helicopter
  • Kingfisherblue helicopter
  • Soaring Falconred helicopter
  • Elite Chopperwhite helicopter
  • Leisure Boatblue boat
  • Pirate Brigwhite boat
Hint

The customer starts with Safari 4x4 (yellow car). Next they should buy Shiny Hornet, which shares its colour. One working order ends with Leisure Boat.

Show the solution
12345678910
Illustration: numbers show the order the customer buys in. Other layouts work too.

Buying order

  1. Safari 4x4 (yellow car)
  2. Shiny Hornet (yellow helicopter, same colour)
  3. Kingfisher (blue helicopter, same type)
  4. Safety 4x4 (blue car, same colour)
  5. Cherry Classic (red car, same type)
  6. Soaring Falcon (red helicopter, same colour)
  7. Elite Chopper (white helicopter, same type)
  8. Clean Classic (white car, same colour)
  9. Pirate Brig (white boat, same colour)
  10. Leisure Boat (blue boat, same type)

Aisle 10

Antiques

Unlock: Solve Puzzle 129, A Sweeping Solution · 10 items

1
Illustration: the starting item (1) is already on the shelf. Thick lines are shelf dividers.

Goods to place

  • Gravy Boatwhite china
  • Tea Potyellow china
  • Sugar Bowlred china
  • Classic Clockyellow clock
  • Creaky Clockred clock
  • Elegant Clockpurple clock
  • Dusty Tomered book
  • Thick Tomepurple book
  • C'est une rosered painting
  • Fleurs d'hiverpurple painting
Hint

The customer starts with Gravy Boat (white china). Next they should buy Tea Pot, which shares its type. One working order ends with Thick Tome.

Show the solution
12345678910
Illustration: numbers show the order the customer buys in. Other layouts work too.

Buying order

  1. Gravy Boat (white china)
  2. Tea Pot (yellow china, same type)
  3. Classic Clock (yellow clock, same colour)
  4. Elegant Clock (purple clock, same type)
  5. Creaky Clock (red clock, same type)
  6. Dusty Tome (red book, same colour)
  7. Sugar Bowl (red china, same colour)
  8. C'est une rose (red painting, same colour)
  9. Fleurs d'hiver (purple painting, same type)
  10. Thick Tome (purple book, same colour)

↑ Back to the showcase

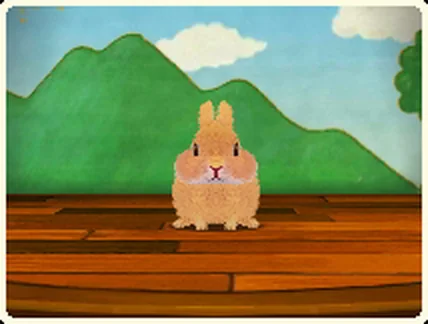
The Rabbit Show: the brown rabbit standing on a wooden stage in front of green hills

Minigame

The Rabbit Show

A circus rabbit wants to be a star. Teach him actions, then direct him through ten little stage plays.

Unlocks
Chapter 1, when the rabbit joins the trunk
Stages
10 plays · 28 actions
Controls
Touch the rabbit to train him; pick actions from the list
Reward
All ten plays: The Ringmaster's House in Layton's Challenges
How it plays
  • Read the script, then pick an action for the rabbit at each moment. The ringmaster calls out what the key moments need.
  • The rabbit can only perform actions he already knows. Learn more by chatting with him and by training him on the Touch Screen.
  • Each play needs a set number of different actions, so some plays must wait until he knows enough.

0 of 10 plays cleared

Plays

Play 1

Sunflowers in the Storm

Unlock: Ready when the rabbit joins you · 6 actions in the script

"Bunny is enjoying a pleasant walk in the woods one day, when things take an unexpected turn!"

This script is going to require six different actions, got it?

Hint

The ringmaster's tips for the key moments:

  1. "You'll want to amble along in a joyful way here. Look happy!"
  2. "Look frightened! Maybe quiver a bit."
  3. "This is easy! Just look surprised."
  4. "Well, I certainly hope you don't need any help getting motivated for this."
  5. "Look around at your surroundings in amazement. Big eyes!"
  6. "This one is easy. I want to see you bursting with joy!"

Actions you'll need for those moments: Awe, Cheer, Flee, Jaunt, Shiver, Shock.

Show the answer
#SceneActionType
1It was a hot, sunny day, and Bunny set out happily for a stroll in the woods.JauntKey moment
2He'd only gone a little way, though, when black clouds filled the sky. Soon he heard the deep rumble of thunder.ShiverKey moment
3Bunny ran into the woods for cover, when lightning struck a giant tree!ShockKey moment
4Poor, startled Bunny turned tail and ran away from the woods as fast as his legs would carry him!FleeKey moment
5Bunny ran until he realized the rain had stopped. He was amazed to see that he was standing in a field of sunflowers.AweKey moment
6No longer scared, Bunny was glad the storm happened, because now he had lots of tasty sunflower seeds to eat!CheerKey moment

Key moments need the action shown. At free-choice moments other actions also fit; the one listed is the script's own pick.

Play 2

Mail Bunny

Unlock: Solve Puzzle 021, A Lick of Paint · 6 actions in the script

"Bunny the postman's work is never done. He delivers letters to all of the creatures of the forest."

This script is going to require six different actions, got it?

Hint

The ringmaster's tips for the key moments:

  1. "Ready to give it your all? First, give me a gleeful look. Glee everywhere!"
  2. "What would you do if you were startled awake? Do that."
  3. "This is the key part, you hear? Look playful! Act the fool!"
  4. "It's dangerous, so you're scared. Very scared. Got it?"

Actions you'll need for those moments: Cheer, Shiver, Shock, Wiggle.

Show the answer
#SceneActionType
1He loves delivering mail, because he gets to see his friends every day.CheerKey moment
2The only part he doesn't like is getting up early. Bunny is not a morning rabbit and is in the habit of oversleeping...ShockKey moment
3But even on those days, he always finishes his round in good time.WiggleKey moment
4It's a teensy bit dangerous...ShiverKey moment
5Luckily, he has a shortcut that leads him safely to nearly anywhere in the woods!PranceFree choice
6Today's mailbag is bulging with letters and packages, so he'd better get going!JauntFree choice

Key moments need the action shown. At free-choice moments other actions also fit; the one listed is the script's own pick.

Play 3

Little Lost Squirrel

Unlock: Solve Puzzle 046, Toppings Up! · 9 actions in the script

"A cheery Bunny runs into a baby squirrel who's gotten lost. Can he help her find her way home?"

This script is going to require nine different actions, got it?

Hint

The ringmaster's tips for the key moments:

  1. "Hmm... I think a slightly bashful look would work best here."
  2. "I want you looking concerned, as if you don't know what to do."
  3. "You're working hard, doing the best you can for your little friend."

Actions you'll need for those moments: Blush, Dig, Worry.

Show the answer
#SceneActionType
1One fine day, Bunny was in high spirits.JauntFree choice
2And no wonder: he was on his way home from the bakery with a freshly baked cake under his bunny arm.BlushKey moment
3But as he happily skipped along, he suddenly found himself nose-to-nose with a baby squirrel.SpyFree choice
4Where had the little thing come from? Bunny tried to talk to her, but the squirrel just cried and cried.WorryKey moment
5Bunny thought maybe he could make her laugh with a few tricks!WiggleFree choice
6But it was no good. The only way he could comfort the baby was to give her his delicious cake.ShiverFree choice
7Once she had calmed down, the baby squirrel told Bunny where she lived, and he took her home to her mother.DigKey moment
8But poor Bunny was now out of cake! He headed home with sad, drooping ears...SulkFree choice
9But then the squirrel's mother ran out and gave Bunny a gigantic carrot cake!CheerFree choice

Key moments need the action shown. At free-choice moments other actions also fit; the one listed is the script's own pick.

Play 4

Eve of the Carnival

Unlock: Solve Puzzle 050, Kitty Solitaire · 10 actions in the script

"On the eve of the carnival, Bunny stays up late having the time of his life with all of his friends..."

This script is going to require 10 different actions, got it?

Hint

The ringmaster's tips for the key moments:

  1. "Hmm... You want to look excited, so how about a little twirl?"
  2. "Come on! I hardly need to tell you this one."
  3. "You've just woken up and you're late, so look anxious!"
  4. "Hmph. You'd probably want to be squirming with frustration here."

Actions you'll need for those moments: Slump, Spin, Tantrum, Worry.

Show the answer
#SceneActionType
1Bunny was so excited he could barely keep still!WiggleFree choice
2He hopped back and forth until he could stand it no longer and decided to visit his friend, the squirrel.JauntFree choice
3After playing with the squirrel, Bunny went over to see the beaver.SpinKey moment
4The two friends had a great time, and it was nearly dark before Bunny set off for home. On the way, he bumped into an owl.SulkFree choice
5The owl was just as excited as Bunny was, and he babbled on happily about the carnival until late into the night.StaggerFree choice
6He sank into a deep slumber and had blissful dreams about the carnival and all his friends.SlumpKey moment
7Bunny woke with a start, his fur standing on end.ShockFree choice
8It was late! He'd overslept! What about the carnival?!WorryKey moment
9Bunny rushed out to join in the fun, but he was too late!FleeFree choice
10He'd been so excited about the carnival and stayed up so late that he overslept and missed everything!TantrumKey moment

Key moments need the action shown. At free-choice moments other actions also fit; the one listed is the script's own pick.

Play 5

Home Sweet Home

Unlock: Solve Puzzle 061, Padlocked Fence · 11 actions in the script

"After visiting his friend's house, Bunny feels a bit jealous and decides to move."

This script is going to require 11 different actions, got it?

Hint

The ringmaster's tips for the key moments:

  1. "I want you looking quite green with envy. At least act frustrated!"
  2. "You're the picture of bliss here, as you dream of your new house!"
  3. "Make it a bit more excited now. Maybe even a little playful!"
  4. "You're very pleased with your idea, so we want to capture joy."
  5. "It just dawned on you, so act as if you've had a great idea!"

Actions you'll need for those moments: Blush, Eureka, Jig, Stamp, Wiggle.

Show the answer
#SceneActionType
1Bunny was invited to visit his second cousin, Fluffy, who had just moved into his new home in the woods.JauntFree choice
2When Bunny saw Fluffy's sparkling new house, he grew rather envious. He wanted a new home as well!StampKey moment
3But he also wanted it somewhere more interesting. So he went around to look at all of his friends' houses.SpyFree choice
4"A house near the river like what the beaver has would be nice," thought Bunny.JigKey moment
5"But I also like the squirrel's house. It's right on a treetop and in the sunshine."WiggleKey moment
6"But a big, wide cave like the one the bear has would be convenient too! I could invite everyone over at once!"BlushKey moment
7Bunny pondered all this as he wandered through the woods.SulkFree choice
8The owl listened to Bunny's dilemma, and at the end he shook his feathered head.ChatterFree choice
9Bunny thought about what the owl said, and suddenly the answer came to him!EurekaKey moment
10All this time, he had been envious of his friends, but he had forgotten how lovely and cozy his own house was!CheerFree choice
11Suddenly eager to be back home in his cozy rabbit hole, Bunny dashed off, carrying a valuable lesson with him.PranceFree choice

Key moments need the action shown. At free-choice moments other actions also fit; the one listed is the script's own pick.

Play 6

The Naughty Wolf

Unlock: Solve Puzzle 070, A Perilous Adventure · 13 actions in the script

"Bunny teaches a naughty wolf an important lesson."

This script is going to require 13 different actions, got it?

Hint

The ringmaster's tips for the key moments:

  1. "I want you to look surprised at the naughty wolf's behavior."
  2. "You should smack that naughty wolf! Show him who's boss!"
  3. "Really make fun of the wolf here!"
  4. "This is the play's climax! I'll need a big leap from you!"
  5. "Show me how angry you are with the wolf down the hole! Show me!"
  6. "It's a happy ending, so you want to smile and do a little dance!"

Actions you'll need for those moments: Bunny Kick, Jig, Leap, Shock, Stamp, Wiggle.

Show the answer
#SceneActionType
1Whenever the forest animals were having fun together, Wolfie would play naughty tricks on them.ShockKey moment
2Bunny thought up a plan and secretly dug a big hole.DigFree choice
3Bunny crept up behind Wolfie while he was drinking from the river...SlinkFree choice
4and kicked him into the water!Bunny KickKey moment
5Wolfie wasn't too happy about getting all wet, and he certainly didn't like being made fun of.WiggleKey moment
6Wolfie got very angry and chased Bunny!FleeFree choice
7With Wolfie hot on his heels, Bunny ran straight into the forest.SpyFree choice
8Bunny darted through the woods and jumped into the middle of a patch of tall grass.LeapKey moment
9Wolfie fell right into the hole just as Bunny had planned!CheerFree choice
10Bunny looked down to see Wolfie howling at the bottom of the trap.AweFree choice
11Wolfie realized how mean he had been to the other animals and apologized for his bad behavior.StampKey moment
12He said that he would change his naughty ways and promised to be a good wolf from then on.ChatterFree choice
13The forest animals all enjoyed playing with Wolfie from that day forward.JigKey moment

Key moments need the action shown. At free-choice moments other actions also fit; the one listed is the script's own pick.

Play 7

A Bit of Courage

Unlock: Solve Puzzle 077, Mishmash Map · 13 actions in the script

"A hunter enters the forest... Not good news for Bunny."

This script is going to require 13 different actions, got it?

Hint

The ringmaster's tips for the key moments:

  1. "Get across how angry you are that a hunter would lay a trap."
  2. "You're searching hard for herbs to help the poor bear! Let me feel it!"
  3. "You've just seen a hunter! How surprised do you feel?"
  4. "How did the bear move you? Make the audience laugh here."
  5. "Let your happiness really show for the final happy ending!"

Actions you'll need for those moments: Dig, Jig, Roll, Shock, Stamp.

Show the answer
#SceneActionType
1Bunny was hopping through the trees when he bumped into the bear, who looked like he was in pain.PranceFree choice
2Bunny was afraid of the bear, but he plucked up the courage to talk to him.ShiverFree choice
3The bear said he hurt his paw by stepping in a hunter's trap.StampKey moment
4Bunny wanted to help and went to talk to the owl. The owl was the wisest of all his friends in the forest.ChatterFree choice
5The owl told Bunny to get some medicinal herbs that would help heal the bear.EurekaFree choice
6Bunny hurried to fetch the herbs and took them to the bear.DigKey moment
7This made the bear feel a lot better. He thanked Bunny and made his way home.CheerFree choice
8Bunny was merrily hopping through the forest when all of a sudden he was spotted by a hunter!ShockKey moment
9Bunny hopped as fast as he could, but the hunter chased him all the way to the river.FleeFree choice
10But Bunny couldn't swim. He thought he was done for!WorryFree choice
11Then, out of nowhere, a bear appeared! He knocked Bunny out of harm's way then roared and scared off the hunter!RollKey moment
12The bear paid back Bunny for the courage and kindness he'd shown earlier.WiggleFree choice
13They've been friends ever since!JigKey moment

Key moments need the action shown. At free-choice moments other actions also fit; the one listed is the script's own pick.

Play 8

Fuzzy Dance-Off

Unlock: Solve Puzzle 085, Slot Sequence · 14 actions in the script

"Animals can dance, no question there! But can they do it with style?"

This script is going to require 14 different actions, got it?

Hint

The ringmaster's tips for the key moments:

  1. "Imagine how shy you'll be when she's watching! Really take it in."
  2. "Everybody gets the jitters in front of a big crowd."
  3. "Dash it all! Break down that wall of nerves! Go right through it!"
  4. "Before you really start to dance, get your hips warmed up!"
  5. "You can walk on your front paws, right? Show them how it's done!"
  6. "You're jumping with joy! Spread your emotions to the crowd! Share them!"
  7. "Click your heels as you jump. That's a real crowd-pleaser!"
  8. "Now break off your dance with a grand finish!"

Actions you'll need for those moments: Blush, Breakin' Bunny, Bunny Kick, Flutter, Hand Walk, Jig, Wiggle, Worry.

Show the answer
#SceneActionType
1Bunny was no exception. He loved living in the forest too.JauntFree choice
2One day, a dance contest was announced to decide who was the best dancer in the forest.ShockFree choice
3This was Bunny's big chance to impress the rabbit of his dreams!BlushKey moment
4Bunny hurried home and practiced his best moves all night long.FleeFree choice
5The forest animals were all showing off their moves in front of a big crowd.WorryKey moment
6Bunny scanned the crowd and saw that even the rabbit he had a crush on was there.SpyFree choice
7It was finally Bunny's turn, but he was a fluffy bag of nerves.ShiverFree choice
8Bunny decided to give it everything he had and dance with all his might.Bunny KickKey moment
9Wiggle, wiggle! Bunny's shaking put everybody in a trance!WiggleKey moment
10Then he walked around on just his front paws! A great display of strength! His nerves did make him a little unsteady...Hand WalkKey moment
11Wow! Some gasps rose from the crowd as Bunny really got going!JigKey moment
12Next came an acrobatic jump! It wasn't perfect, but the crowd didn't mind.FlutterKey moment
13And for the big finale, an old-school break-dancing move!Breakin' BunnyKey moment
14And the victorious Bunny even stole the heart of his bunny sweetheart too!CheerFree choice

Key moments need the action shown. At free-choice moments other actions also fit; the one listed is the script's own pick.

Play 9

The Snow Bunny

Unlock: Solve Puzzle 116, Ferris Letters · 16 actions in the script

"Bunny ventures deep into the forest to find a special flower."

This script is going to require 16 different actions, got it?

Hint

The ringmaster's tips for the key moments:

  1. "A cheeky little gesture works here. Show off that cuteness."
  2. "To save the boy, Bunny's going to have to kick off his fears."
  3. "Just a simple tumble should do."
  4. "You're tired and sore, but you'd still do anything to save the boy!"
  5. "Bunny is on his way out here. The choice is obvious."
  6. "In this moving scene, Bunny talks modestly to the boy."
  7. "You're happy that the boy is well. Show him how you feel."

Actions you'll need for those moments: Blush, Bunny Kick, Jig, Roll, Slump, Stagger, Wiggle.

Show the answer
#SceneActionType
1Then one day, the boy met Bunny.JauntFree choice
2Bunny was timid, but he always went about his way with a smile on his whiskers.WiggleKey moment
3They soon became the best of friends, and Bunny visited the boy every day.PranceFree choice
4The boy's illness became worse, so he could not meet Bunny anymore.SulkFree choice
5Bunny knew the boy's only hope was the nectar from a rare flower. He had to get it!EurekaFree choice
6But the flower only grew deep within a very dangerous forest.ShiverFree choice
7So Bunny plucked up his courage and went into the woods.Bunny KickKey moment
8Bunny searched high and low for the flower.SpyFree choice
9Just when he was about to give up, he saw it at last!CheerFree choice
10Bunny had to hop as fast as he could down a perilous path to get the flower to the boy.AweFree choice
11Unfortunately, Bunny fell down a steep slope when his paws slipped on some ice!RollKey moment
12Thinking only of saving the boy, Bunny made his way through the snow.StaggerKey moment
13The boy picked up the flower and was suddenly surrounded by a strange glow.SpinFree choice
14It wasn't long before he found Bunny lying in the snow.SlumpKey moment
15The boy thought he could hear a voice somewhere in the wind...BlushKey moment
16"I'm glad you got better. Will you come and visit me next time it snows?"JigKey moment

Key moments need the action shown. At free-choice moments other actions also fit; the one listed is the script's own pick.

Play 10

The Greatest Treasure

Unlock: Solve Puzzle 126, Mystery Room · 15 actions in the script

"Bunny is hard at work preparing for a harsh winter, but the fox is still just playing every day. How will it all end?"

This script is going to require 15 different actions, got it?

Hint

The ringmaster's tips for the key moments:

  1. "At the start, you need to look hard at work."
  2. "How would you feel if the fox was making fun of you? Angry, right?!"
  3. "Give it your best look of concern."
  4. "I want you to look surprised when you open that door!"
  5. "Show how happy you are!"
  6. "Sometimes saying your feelings can be embarrassing. Show it!"
  7. "It's a happy ending, so let's make it feel like one! Challenge yourself!"

Actions you'll need for those moments: Blush, Cheer, Dig, Jig, Shock, Stamp, Worry.

Show the answer
#SceneActionType
1Bunny was hard at work getting ready for the coming weather.DigKey moment
2He helped the squirrel collect nuts.SpyFree choice
3He helped the bear collect strawberries.RollFree choice
4The fox, on the other hand, never helped out and just made fun of how hard all the other animals were working.StampKey moment
5Fortunately, Bunny's hard work paid off, and he waited for the return of spring, snug and warm in his cozy home.ShiverFree choice
6One chilly winter's day, Bunny went to the river to find the fox looking quite sad.JauntFree choice
7Bunny felt sorry for the fox and went to see what was wrong.ChatterFree choice
8"I asked the squirrel and the bear for help, but they ignored me. They just left me out here in the cold!"WorryKey moment
9Bunny was still worried about the fox, so he went back to the river.SulkFree choice
10Bunny felt so sorry for the fox that he invited him back to his house.EurekaFree choice
11He shared the nuts and strawberries that he had worked so hard to collect with the fox.SpinFree choice
12Then there was a knock at the door!ShockKey moment
13They brought their own supplies of food to share with the fox too!CheerKey moment
14Bunny looked at his furry friends and smiled.BlushKey moment
15"The most important thing is friendship!"JigKey moment

Key moments need the action shown. At free-choice moments other actions also fit; the one listed is the script's own pick.

The 28 actions

Some actions come up in chats with the rabbit; the rest you teach him on the training screen by touching him the right way. Not sure? Each training tip is hidden until you open it.

ActionWhat it showsHow he learns it
CheerA little bound of happiness.Chat with the rabbit for the first time
JauntWalk along at a merry pace.Chat with the rabbit
PranceBound forward with delight.Chat with the rabbit
BlushA little bit embarrassed.Chat after finishing play 2
DigWork hard at digging.Training (Idea comes from a chat after play 2)
How to teach it

"Bunnies look determined when they're digging. I could try tapping the ground around his feet..."

SpinTwirl on the spot.Training
How to teach it

"I need to get him on his hind legs and make him spin. Maybe if I rub his chest from side to side..."

JigA gleeful, lively dance.Training (Idea comes from a chat after play 4)
How to teach it

"A spin and then a backflip! It might work if he stands up and I rub him from head to tummy."

WiggleA playful tail wiggle.Training (Idea comes from your first chat)
How to teach it

"He called his tail a tuftie! Maybe if I give it a tug from side to side..."

Hand WalkA wobbly walk on front legs.Chat with the rabbit
LeapDo a great leap in the air.Training (Idea comes from a chat after play 5)
How to teach it

"A big leap, hmm? I could make him face the other way and then try tapping him on his back..."

SpyLook around furtively.Chat after finishing play 2
Bunny KickA fierce kick only for rabbits.Training
How to teach it

"To kick, he would have to stand up. Then I could try tapping rhythmically to his left or his right."

RollAn adorable forward roll.Training
How to teach it

"If it's anything like a forward roll, he might do it if I rub his back..."

Breakin' BunnyPerform some hip hops!Training
How to teach it

"Apparently, this dance involves a handstand and plenty of spinning. Let's try rocking him side to side."

ShiverTremble with fear.Chat with the rabbit for the first time
SulkShuffle along miserably.Chat with the rabbit
FleeRun away in terror!Chat with the rabbit
StampStamp your feet in a huff.Chat after finishing play 2
SlumpCollapse with exhaustion.Training (Idea comes from a chat after play 3)
How to teach it

"He has to be splayed out for this to work. Hmm. What if I tried pulling his tummy to the floor?"

StaggerWobble on the verge of falling.Chat after finishing play 1
TantrumSquirm with frustration!Training (Idea comes from a chat after play 3)
How to teach it

"I used to roll over and writhe like a baby. I think tickling his chest might provoke a similar reaction!"

ShockFall over with surprise.Chat with the rabbit
AweLook from side to side in awe.Chat with the rabbit
SlinkSneak with intent.Chat after finishing play 4
WorryA gush of concern.Chat after finishing play 2
EurekaWhat a brilliant idea!Chat after finishing play 3
ChatterChat away enthusiastically.Chat after finishing play 1
FlutterJump and kick in the air.Chat with the rabbit

↑ Back to the showcase

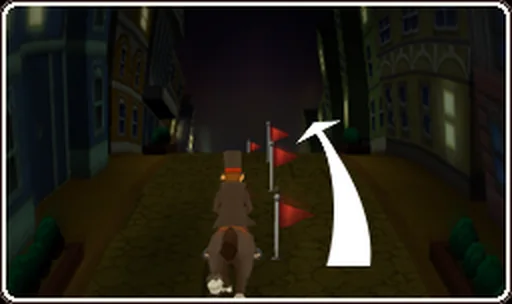
Horse Riding: Layton rides through a dark street towards a line of red flags

Minigame

Horse Riding

The policeman who saw your chase after the Masked Gentleman invites you back for some recreational riding on three flag courses.

Unlocks
Chapter 5: at night, talk to the policeman in Carnival Square
Stages
3 courses
Controls
Short stylus swipes on the Touch Screen
Reward
High scores (no bonus puzzles)
How it plays
  • Ride to the goal and collect as many flags as you can. Your best score is recorded.
  • Slide the stylus left or right in short, quick strokes to steer.
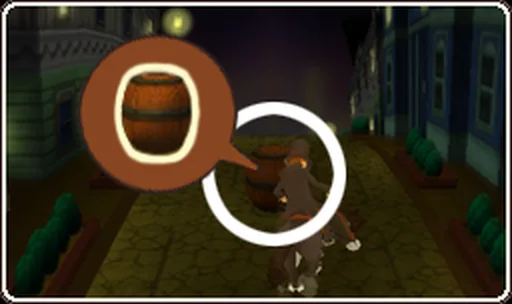
  • Hitting a barrel makes the horse stumble and slow down, which costs points.
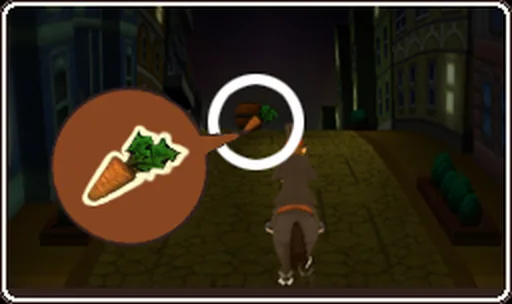
  • A carrot gives a burst of speed that lets you plow through barrels.
  • In the story you also ride after the Masked Gentleman: keep to his trail and take the same turns he does.

0 of 3 courses cleared

Courses

Course 1

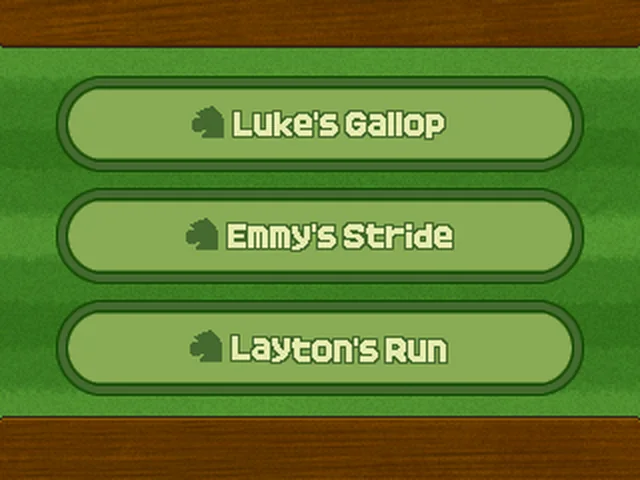
Luke's Gallop

Unlock: Open from the start

"A casual course for the beginner. Practice the basics here!"

Hint
  • Short, quick strokes are enough. Big swipes make the horse overshoot the flags.
  • Watch for barrels and steer early. Grab carrots whenever you can; while the burst lasts you can plow straight through barrels.
Show the strategy
  • Learn where the flags sit: the courses are the same every time, so a second run is much easier.
  • A good score opens Emmy's Stride. Collect every flag for a perfect score.

Course 2

Emmy's Stride

Unlock: Get a good score on Luke's Gallop

"A solid intermediate course for riders who love the wind in their hair."

Hint
  • More barrels sit between the flags. Line up for the next flag before you pass the current one.
  • Save your steering for flags; carrots will carry you through barrel clusters.
Show the strategy
  • Learn the course a stretch at a time and aim to repeat the clean parts.
  • A good score opens Layton's Run.

Course 3

Layton's Run

Unlock: Get a good score on Emmy's Stride

"An advanced course for those who can't resist a challenge."

Hint
  • Flags switch sides quickly. Keep strokes tiny so you can correct fast.
  • A carrot burst makes barrels harmless, so use it to take the straight line to the next flag.
Show the strategy
  • Memorise the flag order: the run rewards knowing what's coming more than fast reactions.
  • Collect every flag for a perfect score.

↑ Back to the showcase

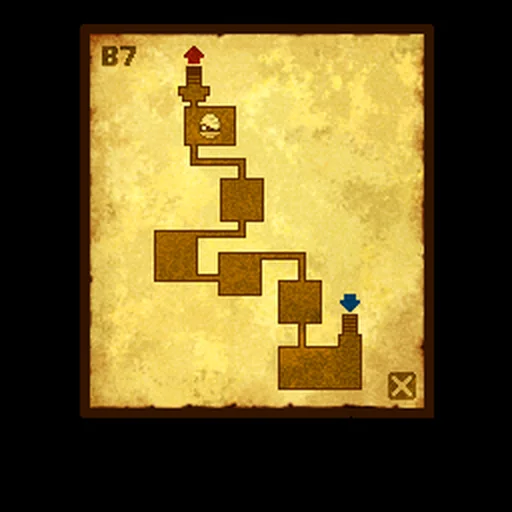
In-game map of Ruins B7: corridors and rooms drawn on parchment

Minigame

Akbadain Ruins

A top-down adventure through the ruins beneath Monte d'Or: dodge mechanical mummies, roll boulders and dig for treasure on the way down to the gate.

When
Chapter 6, The Ghosts of Akbadain, as young Hershel with Randall
Stages
8 floors · 17 challenge rooms · 10 puzzles
Controls
Touch arrows or +Control Pad / Circle Pad; A to dig and push
Reward
Hint coins, collection items and five buried puzzles
How it plays
  • Move with the arrows on the Touch Screen or the +Control Pad / Circle Pad. Press A (or the button on screen) to dig and to push.
  • Mummy rooms: every time you step or dig, each mummy takes a step towards you. Red mummies take two steps. Bury spiked mummies and they leave spikes behind. Reach the exit without being caught.
  • Boulder rooms: pushed boulders roll until they hit something; a rolling boulder smashes crystals in its way if it travels at least one square. Clear a path to the exit.
  • Glowing dig spots hide hint coins, collection items and buried puzzles.

0 of 8 floors cleared

Floors

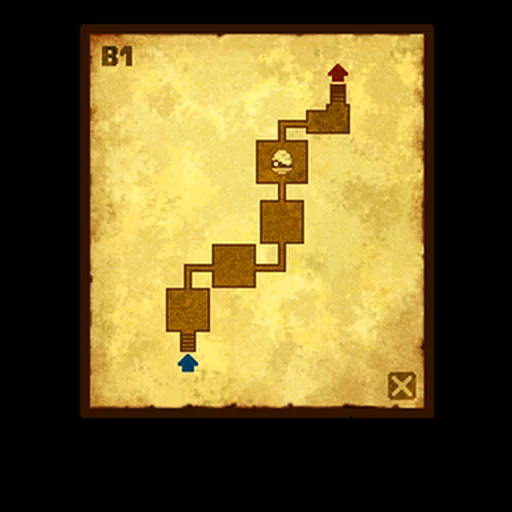
Floor B1

Ruins B1

1 challenge room · 0 puzzles

In-game map of Ruins B1
Illustration of the game's own map of B1

Challenge rooms

  • Mummy room 1

Mummy room 1

Hint

Begin with: ← 1 · ↑ 5 · ← 1

Every step or dig gives the mummies a move. Lure them into corners, then slip past.

Show the route
  1. ← 1 · ↑ 5 · ← 1
  2. ← 1 · ↓ 1 · dig 1
  3. ↓ 3 · ← 2 · ↑ 4 · ← 1 · step on the switch 2
S12
Illustration: S is where you enter. Numbers match the list; dashed lines mean "walk there by any route". Walls and mummies aren't drawn.

Floor B2

Ruins B2

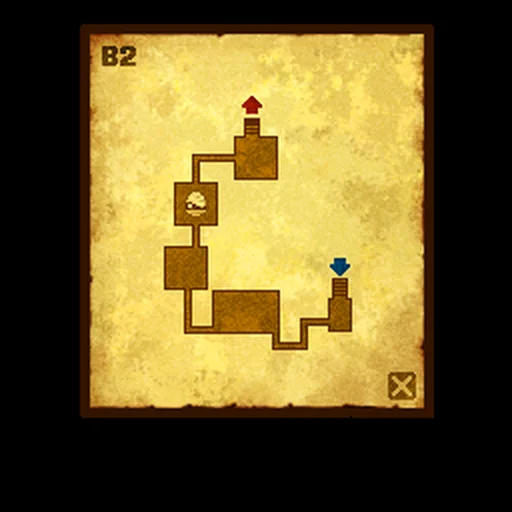
2 challenge rooms · 1 puzzle

In-game map of Ruins B2
Illustration of the game's own map of B2

Puzzles on this floor

Challenge rooms

  • Boulder room 1
  • Mummy room 2

Boulder room 1

Hint

Begin with: walk to 1 and push ↑

Boulders roll until they hit something, so think about where each one will stop before you push.

Show the route
  1. walk to 1 and push ↑
  2. walk to 2 and push ←
  3. walk to 3 and push ↓
  4. walk to 4 and push →
  5. walk to 5 and push ↑
S12345
Illustration: S is where you enter. Numbers match the list; dashed lines mean "walk there by any route". Walls and mummies aren't drawn.

Mummy room 2

Hint

Begin with: ← 2 · ← 1 · push ↑ 1

Every step or dig gives the mummies a move. Lure them into corners, then slip past.

Show the route
  1. ← 2 · ← 1 · push ↑ 1
  2. ← 1 · ↑ 2 · ← 2 · push ← 2
  3. → 4 · ↑ 2 · ← 3 · push ↑ 3
  4. ← 1 · ↓ 4 · ← 2 · ↑ 2 · ← 2 · ↑ 1
S123
Illustration: S is where you enter. Numbers match the list; dashed lines mean "walk there by any route". Walls and mummies aren't drawn.

Floor B3

Ruins B3

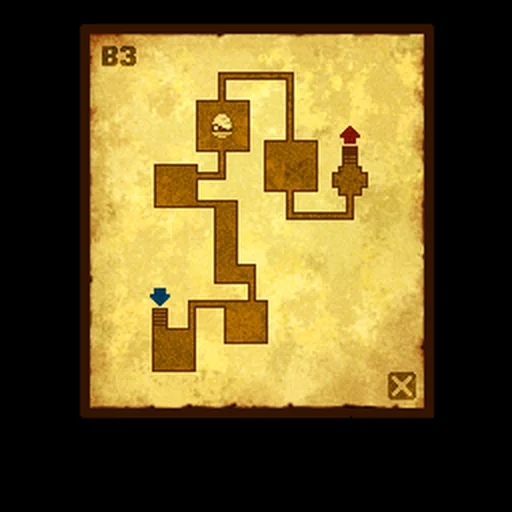
3 challenge rooms · 1 puzzle

In-game map of Ruins B3
Illustration of the game's own map of B3

Puzzles on this floor

Challenge rooms

  • Boulder room 2
  • Mummy room 3
  • Boulder room 3

Boulder room 2

Hint

Begin with: walk to 1 and push ↑

Boulders roll until they hit something, so think about where each one will stop before you push.

Show the route
  1. walk to 1 and push ↑
  2. walk to 2 and push ↓
  3. walk to 3 and push →
S123
Illustration: S is where you enter. Numbers match the list; dashed lines mean "walk there by any route". Walls and mummies aren't drawn.

Mummy room 3

Hint

Begin with: ← 1 · ↓ 2 · ← 2 · ↓ 1 · ← 1

Every step or dig gives the mummies a move. Lure them into corners, then slip past.

Show the route
  1. ← 1 · ↓ 2 · ← 2 · ↓ 1 · ← 1
  2. ← 1 · ↓ 1
  3. ← 1 · dig 1
  4. → 1 · ↑ 1 · → 2 · ↑ 4 · ← 1
  5. ← 1 · dig 2
  6. ↓ 3 · ← 2 · ↓ 1 · ← 1
  7. ← 1 · → 1
  8. → 1 · dig 3
  9. walk to the switch 4
S1234
Illustration: S is where you enter. Numbers match the list; dashed lines mean "walk there by any route". Walls and mummies aren't drawn.

Boulder room 3

Hint

Begin with: walk to 1 and push →

Boulders roll until they hit something, so think about where each one will stop before you push.

Show the route
  1. walk to 1 and push →
  2. walk to the switch 2
  3. walk to 3 and push ↓
  4. → 2 ↑ 2 · walk to the lever 4 and pull it
S1234
Illustration: S is where you enter. Numbers match the list; dashed lines mean "walk there by any route". Walls and mummies aren't drawn.

Floor B4

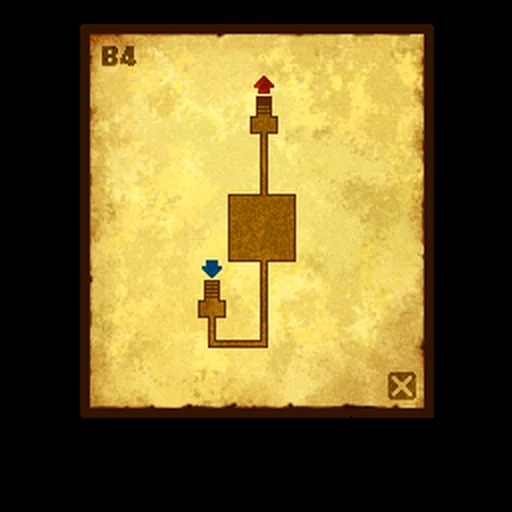
Ruins B4

0 challenge rooms · 1 puzzle

In-game map of Ruins B4
Illustration of the game's own map of B4

Puzzles on this floor

Challenge rooms

  • None on this floor

Floor B5

Ruins B5

3 challenge rooms · 2 puzzles

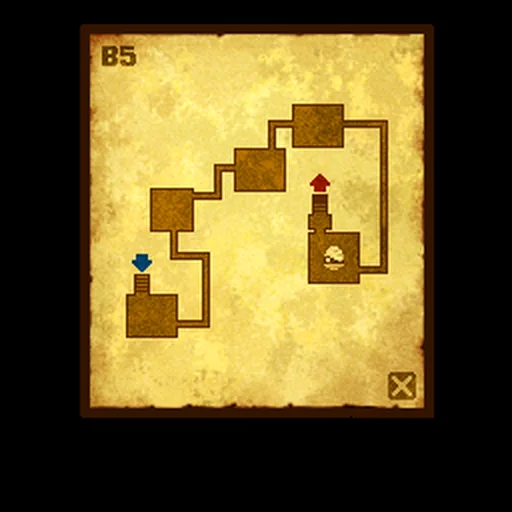
In-game map of Ruins B5
Illustration of the game's own map of B5

Puzzles on this floor

Challenge rooms

  • Boulder room 4
  • Boulder room 5
  • Mummy room 4

Boulder room 4

Hint

Begin with: walk to 1 and push →

Boulders roll until they hit something, so think about where each one will stop before you push.

Show the route
  1. walk to 1 and push →
  2. walk to 2 and push ↓
  3. walk to 3 and push →
  4. walk to 4 and push ←
  5. walk to 5 and push ↑
  6. walk to 6 and push ←
  7. walk to 7 and push →
S1234567
Illustration: S is where you enter. Numbers match the list; dashed lines mean "walk there by any route". Walls and mummies aren't drawn.

Boulder room 5

Hint

Begin with: walk to 1 and push ↓

Boulders roll until they hit something, so think about where each one will stop before you push.

Show the route
  1. walk to 1 and push ↓
  2. walk to 2 and push ↓
  3. walk to 3 and push ←
  4. walk to 4 and push ↑
  5. walk to 5 and push ←
  6. walk to 6 and push ↓
  7. walk to 7 and push →
S1234567
Illustration: S is where you enter. Numbers match the list; dashed lines mean "walk there by any route". Walls and mummies aren't drawn.

Mummy room 4

Hint

Begin with: ↑ 3 · ← 1

Every step or dig gives the mummies a move. Lure them into corners, then slip past.

Show the route
  1. ↑ 3 · ← 1
  2. ← 1 · ↓ 2 · ← 1
  3. ← 1 · → 1 · dig 1
  4. ← 3 · ↑ 7
  5. ↑ 1 · ↓ 4 · → 1
  6. → 1 · ← 1 · dig 2
  7. → 3 · ↑ 3
  8. ↑ 1 · ↓ 4 · → 4
  9. ↓ 1 · dig 3
  10. ↓ 3 · ← 2 · ↑ 2 · ← 2 · ↑ 2
  11. ↑ 1 · dig 4
  12. walk to the switch 5
S12345
Illustration: S is where you enter. Numbers match the list; dashed lines mean "walk there by any route". Walls and mummies aren't drawn.

Floor B6

Ruins B6

4 challenge rooms · 2 puzzles

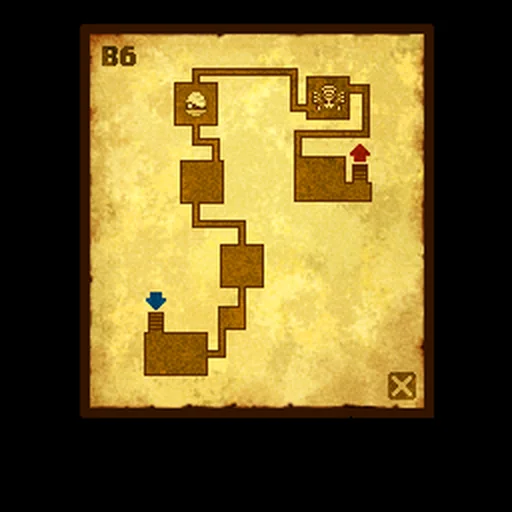
In-game map of Ruins B6
Illustration of the game's own map of B6

Puzzles on this floor

Challenge rooms

  • Boulder room 6
  • Boulder room 7 (Hershel on his own)
  • Boulder room 8 (Hershel on his own)
  • Mummy room 5

Boulder room 6

Hint

Begin with: walk to 1 and push ↓

Boulders roll until they hit something, so think about where each one will stop before you push.

Show the route
  1. walk to 1 and push ↓
  2. walk to 2 and push →
  3. walk to 3 and push ↓
  4. walk to 4 and push →
  5. walk to 5 and push ↑
  6. walk to 6 and push ←
  7. walk to 7 and push ↓
  8. walk to 8 and push →
S12345678
Illustration: S is where you enter. Numbers match the list; dashed lines mean "walk there by any route". Walls and mummies aren't drawn.

Boulder room 7 · Hershel on his own

Hint

Begin with: walk to 1 and push ↑

Boulders roll until they hit something, so think about where each one will stop before you push.

Show the route
  1. walk to 1 and push ↑
  2. walk to 2 and push ↑
  3. walk to 3 and push ↑
  4. walk to 4 and push →
  5. walk to 5 and push ↓
  6. walk to 6 and push ←
  7. walk to 7 and push ↑
S1234567
Illustration: S is where you enter. Numbers match the list; dashed lines mean "walk there by any route". Walls and mummies aren't drawn.

Boulder room 8 · Hershel on his own

Hint

Begin with: walk to 1 and push ↑

Boulders roll until they hit something, so think about where each one will stop before you push.

Show the route
  1. walk to 1 and push ↑
  2. walk to 2 and push ←
  3. walk to 3 and push ↓
  4. walk to 4 and push ←
  5. walk to 5 and push ←
  6. walk to 6 and push ↓
  7. walk to 7 and push ←
  8. walk to 8 and push ↑
  9. walk to 9 and push →
  10. walk to 10 and push ↑
S12345678910
Illustration: S is where you enter. Numbers match the list; dashed lines mean "walk there by any route". Walls and mummies aren't drawn.

Mummy room 5

Hint

Begin with: ← 2 · ← 1 · ↑ 2 · ← 1

Every step or dig gives the mummies a move. Lure them into corners, then slip past.

Show the route
  1. ← 2 · ← 1 · ↑ 2 · ← 1
  2. ← 3 · ↓ 2
  3. walk to the switch 1
  4. walk to 2 and push ↑
  5. walk to 3 and push →
  6. walk to the switch 4
S1234
Illustration: S is where you enter. Numbers match the list; dashed lines mean "walk there by any route". Walls and mummies aren't drawn.

Floor B7

Ruins B7

4 challenge rooms · 2 puzzles

In-game map of Ruins B7
Illustration of the game's own map of B7

Puzzles on this floor

Challenge rooms

  • Boulder room 9
  • Boulder room 10
  • Boulder room 11
  • Mummy room 6

Boulder room 9

Hint

Begin with: walk to 1 and push ↓

Boulders roll until they hit something, so think about where each one will stop before you push.

Show the route
  1. walk to 1 and push ↓
  2. walk to 2 and push →
  3. walk to 3 and push ↑
  4. walk to 4 and push →
  5. walk to 5 and push ↑
  6. walk to 6 and push →
  7. walk to 7 and push ↑
  8. walk to 8 and push →
  9. walk to 9 and push ↑
S123456789
Illustration: S is where you enter. Numbers match the list; dashed lines mean "walk there by any route". Walls and mummies aren't drawn.

Boulder room 10

Hint

Begin with: walk to 1 and push ←

Boulders roll until they hit something, so think about where each one will stop before you push.

Show the route
  1. walk to 1 and push ←
  2. walk to 2 and push ↓
  3. walk to 3 and push ←
  4. walk to 4 and push ↓
  5. walk to 5 and push ←
  6. walk to 6 and push ↑
  7. walk to 7 and push ←
S1234567
Illustration: S is where you enter. Numbers match the list; dashed lines mean "walk there by any route". Walls and mummies aren't drawn.

Boulder room 11

Hint

Begin with: walk to 1 and push ←

Boulders roll until they hit something, so think about where each one will stop before you push.

Show the route
  1. walk to 1 and push ←
  2. walk to 2 and push ↓
  3. walk to 3 and push →
  4. walk to 4 and push ↓
  5. walk to 5 and push →
  6. walk to 6 and push ↓
  7. walk to 7 and push ←
  8. walk to 8 and push ↓
  9. walk to 9 and push ↓
  10. walk to 10 and push ←
  11. walk to 11 and push ↑
S1234567891011
Illustration: S is where you enter. Numbers match the list; dashed lines mean "walk there by any route". Walls and mummies aren't drawn.

Mummy room 6

Hint

Begin with: ← 1 · ↓ 1 · ← 1 · ↓ 2 · ← 1 · ↓ 1 · ← 2

Every step or dig gives the mummies a move. Lure them into corners, then slip past.

Show the route
  1. ← 1 · ↓ 1 · ← 1 · ↓ 2 · ← 1 · ↓ 1 · ← 2
  2. ↑ 1 · ↓ 1 · → 2
  3. ↑ 1 · dig 1
  4. → 1 · ↑ 2
  5. ← 1 · → 2 · ↑ 2 · ← 2 · ↓ 1
  6. ← 1 · dig 2
  7. ← 1 · ↑ 1 · ← 1
  8. ← 1 · → 2 · ↓ 2 · ← 1 · ↓ 2 · ← 1 · ↓ 1
  9. ↓ 1 · dig 3
  10. → 2 · ↑ 2 · ← 1 · ↑ 2 · ← 1 · ↑ 1 · ← 1
  11. ← 1 · → 2 · ↑ 1 · → 1
  12. → 1 · ↓ 2 · ← 2 · ↑ 1
  13. ← 1 · dig 4
  14. walk to the switch 5
S12345
Illustration: S is where you enter. Numbers match the list; dashed lines mean "walk there by any route". Walls and mummies aren't drawn.

Floor B8

Ruins B8

0 challenge rooms · 1 puzzle

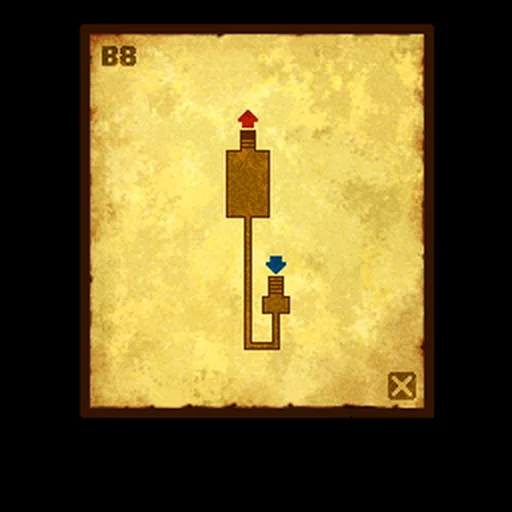
In-game map of Ruins B8
Illustration of the game's own map of B8

Puzzles on this floor

Challenge rooms

  • None on this floor

↑ Back to the showcase

Professor Layton and the Miracle Mask has five minigames. Three of them live in the Professor's trunk and each one fills a house in Layton's Challenges when you finish it. Horse Riding is a short course game you can replay for high scores. The Akbadain Ruins is the Chapter 6 trip under Monte d'Or as young Hershel. Each case in the display above opens that minigame's stages, with a hint first and the full solution behind a second click.

The five minigames at a glance

Minigames, how to open them and what they give you
MinigameHow it opensStagesReward
The Toy RobotSolve Puzzle 005, Robot Factory (Chapter 1)10, plus 15 in the Hidden MazeThe Toymaker's House in Layton's Challenges; after the 10 regular stages, choose Hidden Maze on the Toy Robot map for 15 more stages
The One-Stop ShopSolve Puzzle 010, The Place to Be! (Chapter 1)10 aislesThe Shopkeeper's House in Layton's Challenges
The Rabbit ShowChapter 1, when the rabbit joins the trunk10 plays, 28 actions to teachThe Ringmaster's House in Layton's Challenges
Horse RidingChapter 5, at night: talk to the policeman in Carnival Square3 coursesHigh scores only
Akbadain RuinsChapter 6, The Ghosts of Akbadain8 floors with 17 challenge roomsHint coins, collection items and buried puzzles

Names here follow the North American release. Where a European stage name is known, it's shown under the stage name.

Questions

Where are the trunk minigames?

They're in the Professor's trunk, which you open from the Touch Screen menu. The Toy Robot, the One-Stop Shop and the Rabbit Show appear there once each is unlocked.

How do I open the Hidden Maze?

Clear Toy Robot's 10 regular stages, then choose Hidden Maze on the Toy Robot map to play 15 more stages.

Do the minigames give bonus puzzles?

Yes, three of them do. Finishing the Toy Robot, the One-Stop Shop and the Rabbit Show opens the Toymaker's House, the Shopkeeper's House and the Ringmaster's House in Layton's Challenges.

When should I dig in the Akbadain Ruins?

As you go. The ruins are part of the Chapter 6 story, so check every glowing dig spot on each floor before taking the stairs down. Each floor in the display case lists the puzzles found there.

Does my progress on this page sync anywhere?

No. The "Cleared" ticks stay in this browser only. Use the reset button in a minigame to clear them.